
Imagine waking up to the irresistible aroma of fresh, buttery pastries wafting from your kitchen. Making delicious breakfast pastries from scratch can feel intimidating, but I promise it doesn’t have to be. Forget overwhelming lists and complicated techniques. In this guide, I’ve hand-picked 10 of my easiest, no-fail recipes that deliver bakery-quality results without the stress.
These recipes are designed specifically for beginners who want to create amazing breakfast pastries, but are so delicious that everyone will love them. Get ready to build your baking confidence and fill your mornings with warm, golden treats that taste as incredible as they look.
Table of Contents
From Messy Kitchens to Morning Magic: My Pastry Story
My obsession with breakfast pastries began in the humblest way inside a cramped college kitchen with a rolling pin that had seen better days.
One chilly Saturday morning, I decided to tackle homemade croissants armed with nothing but enthusiasm. The results? More “rustic breakfast biscuit” than flaky French perfection but the moment I pulled them from the oven, I was completely hooked.
That experience taught me that mastering great breakfast pastries isn’t about being a professional. It’s about understanding the fundamentals.
My first real win was a batch of puff pastry apple turnovers. That’s when I realized baking is about creating little pockets of joy a philosophy that extends beyond breakfast and is the same mindset behind my favorite guilt-free dessert ideas.
This journey is why I created this specific list for you. These are the 10 foolproof recipes I wish I had when I started, each one designed to help you skip the stress and discover the joy of baking with confidence.
10 Foolproof Breakfast Pastries for Beginners
1. Foolproof Buttermilk Scones

Imagine pulling tender, flaky scones from your own oven ones with buttery layers and a hint of sweetness that genuinely rival your favorite café. This is the perfect recipe to start with because the dough is incredibly forgiving and comes together in just a few simple steps.
Ingredients:
- 2 cups all-purpose flour
- 3 tablespoons granulated sugar
- 1 tablespoon baking powder
- ½ teaspoon salt
- ½ cup (1 stick or 113g) unsalted butter, straight from the fridge and cut into small cubes
- ⅔ cup cold buttermilk
- 1 large egg, lightly beaten to create an egg wash
Instructions:
- Prepare Your Station: To start, arrange an oven rack in the center position and get your oven heating up to 400°F (200°C). Meanwhile, cover a large baking sheet with a piece of parchment paper.
- Whisk the Foundation: In a large mixing bowl, combine the flour, sugar, baking powder, and salt. Whisking them together ensures that the leavening is evenly distributed for a perfect rise.
- Incorporate the Butter: Add the chilled butter cubes to the dry ingredients. Using either a pastry blender or your fingertips, swiftly break down the cold butter directly into the flour. The goal is a coarse, mealy consistency where you can still see little pockets of butter throughout. Those pockets are the secret to flaky layers!
- Add the Buttermilk: Pour the cold buttermilk in all at once. Use a fork to gently stir until a shaggy, slightly sticky dough comes together. The key here is to resist the urge to overmix; a few dry spots are perfectly fine.
- Shape the Dough: Tip the shaggy dough mass out onto a clean work surface that you’ve dusted with a little flour. Gently press and knead the dough just two or three times until unified. Using the palms of your hands, gently flatten the unified dough into a circular shape that stands about one inch tall. With a bench scraper or a long knife, press down firmly to divide the disc into eight triangular portions.
- Bake to Perfection: Arrange the scones on your prepared baking sheet. For a rich, golden finish, lightly brush the tops with the beaten egg. Allow them to bake for 12 to 15 minutes. The scones are ready when they have puffed up tall and their tops are baked to an even, rich golden-brown.
2. Bakery-Style Blueberry Muffins

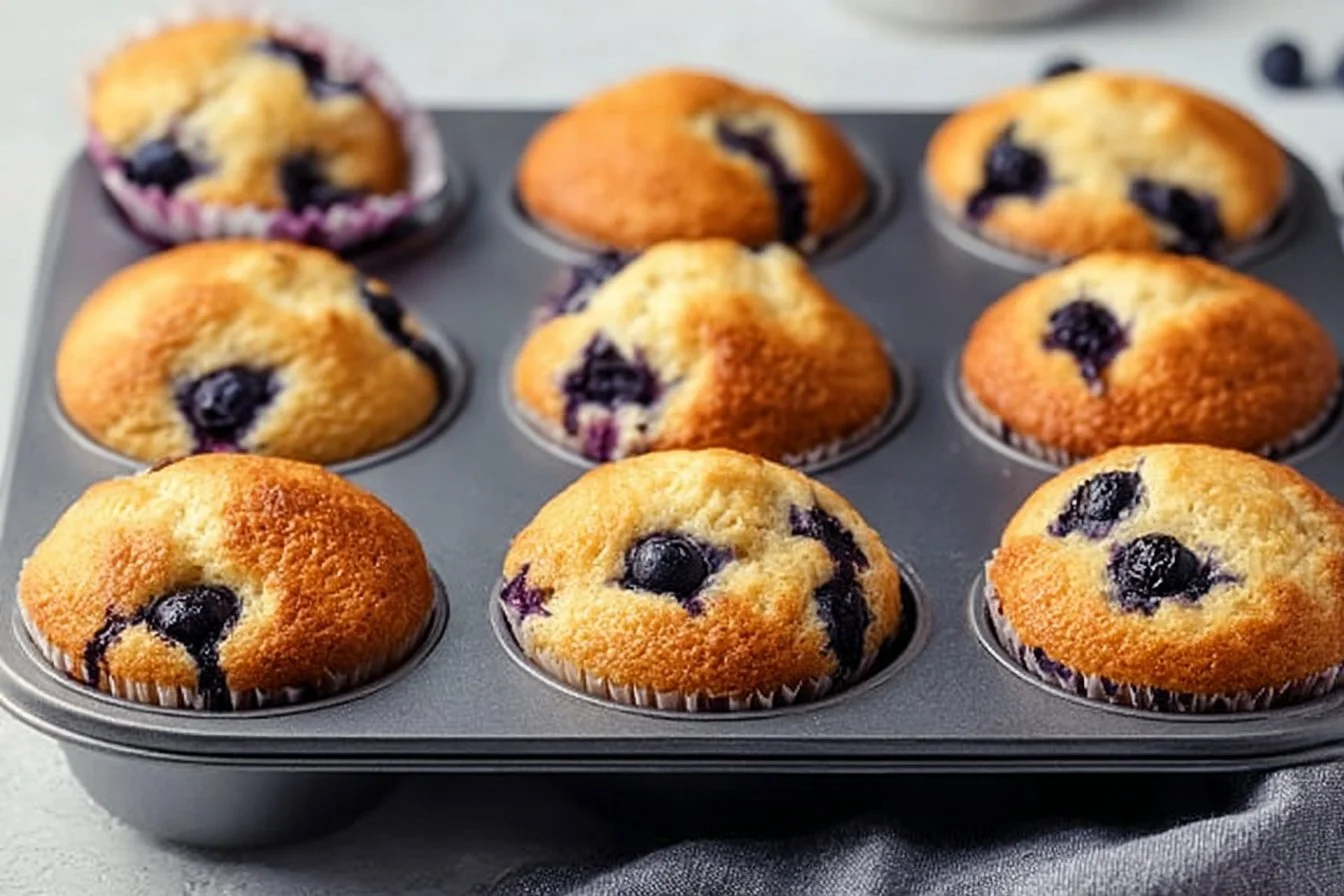
The simple technique behind achieving those impressive, high-domed muffin tops you see in bakeries is an initial blast of intense heat. This recipe harnesses that professional trick to create stunning, moist, and berry-packed muffins every single time.
Ingredients:
- 1 ½ cups all-purpose flour
- ¾ cup granulated sugar
- 2 teaspoons baking powder
- ½ teaspoon salt
- ⅓ cup vegetable oil
- 1 large egg
- ⅓ cup milk
- 1 teaspoon vanilla extract
- 1 cup fresh or frozen blueberries
Instructions:
- Prepare your Oven and Tin: The first step is to bring your oven’s temperature up to a hot 425°F (220°C). While the oven warms, get your muffin pan ready by placing a paper liner in each cavity.
- Create Wet and Dry Mixes: In a large bowl, create the foundation of your batter by blending the flour, sugar, baking powder, and salt with a whisk. In a separate, medium-sized bowl, combine your liquid ingredients by whisking the oil, egg, milk, and vanilla until smooth.
- Combine the Batter: Form a small hollow in the middle of your flour blend and pour the wet ingredients directly into it. With a rubber spatula, gently fold everything together just until you no longer see dry flour streaks. Remember, a lumpy batter is a happy batter it’s the secret to a tender muffin, so don’t be tempted to overmix!
- Add the Berries: Gently introduce the blueberries into the batter, folding them in with just a couple of stirs to distribute them evenly.
- Bake with the Two-Temp Method: Divide the finished batter evenly among the prepared muffin cups, so that each one is about 75% full. Place the tin in the oven for an initial 5-minute bake at the high temperature. After 5 minutes, without opening the oven door, drop the temperature down to 375°F (190°C). Let the muffins bake for an additional 15 to 18 minutes. You’ll know they are perfectly cooked if a wooden skewer poked into the center of a muffin emerges without any wet batter attached.
3. Quick & Easy Cinnamon Rolls (No-Yeast)

Get that classic, gooey cinnamon roll flavor without the fear of working with yeast! This clever recipe uses baking powder for a soft, fluffy result in a fraction of the time, making them one of the most rewarding easy breakfast pastries you can make.
Ingredients:
- For the Dough: 2 cups all-purpose flour, 1 tablespoon baking powder, 2 tablespoons sugar, ½ teaspoon salt, ½ cup cold unsalted butter, ¾ cup milk.
- For the Rich Cinnamon Filling: ¼ cup softened unsalted butter, ½ cup brown sugar, 1 tablespoon ground cinnamon.
- For the Sweet Vanilla Glaze: 1 cup powdered sugar, 2-3 tablespoons milk, plus a ½ teaspoon of vanilla extract.
Instructions:
- Preheat & Prep: Start by getting your oven preheating to 400°F (200°C). Prepare an 8×8 inch baking pan with a light coating of grease.
- Make the Dough: Follow the same simple method used for the scone dough (referencing steps 2-4 in that recipe).
- Roll & Fill: Dust your work surface lightly with flour, then roll the dough into a smooth, even rectangle, keeping the thickness consistent from edge to edge.Spread the softened butter over the surface in a thin, smooth layer, reaching all the way to the edges. Sprinkle the brown sugar and cinnamon generously on top, creating a sweet, fragrant blanket that will form the gooey center.
- Slice & Bake: Starting along one long edge, roll the dough into a tight, uniform log. With a sharp knife, slice the log into 9 equal pieces, making clean cuts to keep those beautiful spirals intact. Place the rolls cut-side up in your prepared pan, leaving a little space between them. Bake for 15–20 minutes, until the tops are puffed, golden, and your kitchen smells like a bakery.
- Glaze: While the rolls are still warm, quickly whisk together the powdered sugar, milk, and vanilla for the glaze. Drizzle it generously over the tops of your finished rolls.
4. 5-Ingredient Cream Cheese Danishes

This “cheater” recipe is a game-changer for making impressive breakfast pastries with almost no effort. Using store-bought dough delivers a flaky, professional result that will make everyone think you spent hours in the kitchen.
Ingredients:
- 1 (8 oz) can of crescent roll dough
- 4 oz cream cheese, softened to room temperature
- ¼ cup sugar
- 1 egg yolk
- ½ teaspoon vanilla extract
Instructions:
- Prepare Your Oven and Pan: Heat your oven to 375°F (190°C) and line a large baking sheet with parchment paper.
- Create the Sweet Filling: Combine softened cream cheese, sugar, egg yolk, and vanilla in a small bowl. Beat with a spoon until the mixture becomes completely smooth and creamy.
- Shape the Danishes: Begin by unrolling the crescent dough, but don’t separate the triangles. Instead, press the diagonal seams together to form solid rectangles. Cut each rectangle in half to create squares.
- Fill & Fold: Drop a dollop of the sweet cream cheese mixture into the middle of each dough square. To create the classic danish shape, bring two opposite corners of the square to the center, overlapping them slightly, and press down gently to seal.
- Bake to Golden: Arrange the danishes on your prepared baking sheet and bake for 12-15 minutes, or until the dough is a beautiful golden-brown and puffed up.
5. Simple One-Bowl Banana Bread

It may be simple, but banana bread is the humble king of quick-bread breakfast pastries, beloved for a reason. This no-fuss, one-bowl recipe is famously hard to mess up and delivers a moist, flavorful loaf every time.
Ingredients:
- 3 very ripe bananas, mashed well
- ½ cup melted unsalted butter
- ¾ cup granulated sugar
- 1 large egg, beaten
- 1 teaspoon vanilla extract
- 1 ½ cups all-purpose flour
- 1 teaspoon baking soda
- ½ teaspoon salt
Instructions:
- Preheat & Prep: Heat your oven to 350°F (175°C) and prepare a 9×5 inch loaf pan by greasing it well and dusting with flour to ensure easy removal.
- Combine Wet Ingredients: In a large bowl, start by blending the mashed bananas with the melted butter, sugar, beaten egg, and vanilla extract until everything is well-combined.
- Add the Dry Ingredients: Sprinkle the flour, baking soda, and salt directly over your wet mixture. Use a spatula to fold everything together until just incorporated. A few lumps in the batter are a good thing!
- Bake the Loaf: Transfer the finished batter into your prepared pan, spreading it into an even layer. Bake for 55-65 minutes. Test for doneness by inserting a wooden skewer into the loaf’s center; it should come out without any wet batter clinging to it. Let it rest in the pan for 10 minutes before turning it out onto a wire rack to cool completely.
6. Easy Apple Turnovers (with Puff Pastry)

Using store-bought puff pastry is the secret weapon for creating flaky, professional-looking breakfast pastries that will stun your family and friends. This recipe provides maximum “wow-factor” for minimum effort.
Ingredients:
- 1 frozen puff pastry sheet, defrosted following package instructions
- 2 medium apples, peeled and diced into small pieces
- 2 tablespoons brown sugar
- 1 teaspoon cinnamon
- 1 tablespoon butter
- 1 egg, beaten with 1 tablespoon of water to create an egg wash
Instructions:
- Preheat & Prep: Get your oven preheating to 400°F (200°C). Prepare a large baking sheet by covering it with parchment paper.
- Cook the Apple Filling: In a small saucepan over medium heat, combine the diced apples, brown sugar, cinnamon, and butter. Cook for roughly 5 minutes, stirring from time to time, until the apples start to soften. Remove from the stove and let the filling cool completely.
- Cut & Fill the Pastry: On a lightly floured surface, carefully lay out your thawed puff pastry sheet and cut it into 4 equal squares. Spoon an equal amount of the cooled apple filling onto one diagonal half of each square.
- Seal and Vent: Fold the empty half of the pastry over the filling to create a triangle. To seal the turnover, crimp the edges firmly using the tines of a fork. Use a small, sharp knife to make a small vent on top of each turnover to allow steam to escape.
- Bake: Transfer the turnovers to your baking sheet. Brush the tops with the egg wash for a glossy finish. Bake for 15-20 minutes, until they are impressively puffed and deep golden-brown.
7. Classic Crumb Coffee Cake

Soft, tender, and crowned with a golden, buttery streusel, this coffee cake is the kind of breakfast pastry that feels like a warm hug. Beloved across America, it pairs perfectly with a morning cup of coffee or honestly, any time you’re craving a little sweetness. The magic lies in the contrast: a moist, fluffy cake base topped with a crunchy, cinnamon-scented crumb layer that makes every forkful irresistible.
Ingredients
For the Streusel Topping
- ¾ cup all-purpose flour
- ½ cup packed brown sugar
- 1 ½ teaspoons ground cinnamon
- 6 tablespoons cold unsalted butter, cubed
For the Cake Batter
- 1 ½ cups all-purpose flour
- ½ cup granulated sugar
- 2 teaspoons baking powder
- ½ cup milk
- 1 large egg
- 6 tablespoons melted unsalted butter
Instructions
Preheat and Prepare: Position your oven rack in the center and heat to 375°F (190°C). Lightly grease and flour an 8×8-inch square baking pan, tapping out any excess flour.
Make the Streusel: In a medium mixing bowl, whisk together the flour, brown sugar, and cinnamon for the topping. Add the cold butter cubes and work them in with your fingertips or a pastry cutter until you have large, crumbly clusters. Set aside.
Mix the Batter: In a large bowl, stir together the flour, granulated sugar, and baking powder. In a separate bowl, whisk the milk, egg, and melted butter until smooth. Gently fold the wet mixture into the dry ingredients, stirring just until the flour is incorporated overmixing can make the cake dense.
Assemble and Bake: Pour the batter into your prepared pan, smoothing it into an even layer. Scatter the streusel topping evenly over the surface, letting some larger chunks remain for extra crunch. Bake for 30–35 minutes, or until the cake turns golden brown and a toothpick inserted in the center emerges clean without any raw batter. Let cool slightly before slicing and serving warm.
8. Baked Cinnamon Sugar Doughnuts

These baked doughnuts are a fantastic way to enjoy one of the most fun breakfast pastries without the mess and fuss of deep-frying. They have a soft, cake-like texture and get their classic flavor from a satisfying dunk in melted butter and cinnamon sugar.
Ingredients:
- 1 ¼ cups all-purpose flour
- ½ cup granulated sugar
- 1 ½ teaspoons baking powder
- ½ teaspoon salt
- ½ teaspoon ground cinnamon
- ½ cup milk
- 1 large egg
- 2 tablespoons melted unsalted butter
- For the Topping: 4 tablespoons melted butter in a shallow bowl, and ½ cup sugar mixed with 1 teaspoon cinnamon in another shallow bowl.
Instructions:
- Preheat & Prep: Heat your oven to 350°F (175°C) and coat a standard doughnut pan with a thin layer of grease.
- Create the Batter: Combine flour, sugar, baking powder, salt, and cinnamon in a large bowl using a whisk. In another bowl, blend the milk, egg, and 2 tablespoons of melted butter until well mixed.
- Combine the Mixes: Pour the wet ingredients into the dry ingredients and stir with a spatula until everything is just combined and no dry spots remain.
- Fill the Pan & Bake: Carefully spoon or pipe the batter into your greased doughnut pan, filling each cavity about three-quarters full. Bake for 10-12 minutes, or until a toothpick inserted into a doughnut emerges clean.
- Coat the Doughnuts: Let the doughnuts cool in the pan for just a minute before turning them out. While they are still warm, dip one doughnut at a time first into the bowl of melted butter, ensuring it’s coated, and then immediately dredge it in the cinnamon-sugar mixture until it’s generously covered.
9. Cheddar & Herb Drop Biscuits

Who says all breakfast pastries have to be sweet? This savory biscuit proves that cheese and herbs are a perfect way to start the day, earning them a well-deserved spot on any list of easy breakfast pastries.
Ingredients:
- 2 cups all-purpose flour
- 1 tablespoon baking powder
- 1 teaspoon sugar
- ½ teaspoon salt
- ½ cup (1 stick) cold unsalted butter, cubed
- 1 cup shredded sharp cheddar cheese
- 2 tablespoons freshly chopped chives or parsley
- ¾ cup cold buttermilk
Instructions:
- Preheat & Prep: Heat your oven to 400°F (200°C). Prepare a large baking sheet by laying parchment paper over it.
- Combine Dry Ingredients: Using a large mixing bowl, whisk together flour, baking powder, sugar, and salt.
- Cut in Butter: Incorporate the cold, diced butter using a pastry blender or your fingertips to quickly blend the butter into the flour until the mixture forms rough, sandy crumbs.
- Add the Flavor: Mix the shredded cheddar cheese and freshly chopped herbs directly into the flour mixture.
- Drop and Bake: Pour in the cold buttermilk and stir with a fork until a wet, shaggy dough develops. Using a large spoon or cookie scoop, drop rounded portions of the dough (approximately ¼ cup each) onto your lined baking sheet. Bake for 12-15 minutes, until the tops turn beautifully golden-brown.
10. Rustic Mixed Berry Galette

This beautiful galette is the ultimate proof that easy breakfast pastries can also be elegant and incredibly impressive. A galette is a “free-form tart,” which means its rustic, homemade appearance is part of its charm it’s supposed to look imperfect!
Ingredients:
- 1 single pie crust (a good-quality store-bought one works perfectly)
- 2 cups mixed berries (fresh or a frozen blend, no need to thaw)
- ¼ cup granulated sugar
- 2 tablespoons cornstarch
- 1 tablespoon lemon juice
- 1 large egg, beaten with 1 tablespoon of water (for egg wash)
Instructions:
- Preheat Oven: Position a rack in the center of your oven and heat to 400°F (200°C).
- Prepare the Crust: Lay a sheet of parchment on your counter. Gently roll your pie dough from the center outwards until it forms an imperfect circle approximately 12 inches wide. Don’t stress about making perfect edges. Transfer the parchment paper with the crust directly onto a baking sheet.
- Mix the Filling: In a medium bowl, gently toss the mixed berries with the granulated sugar, cornstarch, and lemon juice until the berries are evenly coated.
- Assemble the Galette: Spoon the berry mixture into the center of your rolled-out crust, mounding it slightly and leaving a clean 2-inch border all the way around.
- Fold and Bake: Carefully fold the exposed crust border up and over the edge of the berry filling, pleating it as needed to form a rustic edge. Lightly brush the folded edges of the crust with the egg wash, then sprinkle a touch of sugar over the top for extra sparkle and a golden finish once baked. Bake for 30-35 minutes, until the crust turns deep, rich golden and the berry filling bubbles and thickens.
Frequently Asked Questions about Breakfast Pastries
u003cstrongu003eu003cstrongu003eWhat are some common pastries for breakfast?u003c/strongu003eu003c/strongu003e
While this list covers 10 fantastic options, some of the most common u003cstrongu003ebreakfast pastriesu003c/strongu003e you’ll find worldwide include scones, muffins, cinnamon rolls, croissants, and Danishes. The key is that they are typically richer and more substantial than a dessert pastry, designed to be enjoyed in the morning.
u003cstrongu003eWhat is the easiest breakfast pastry for a total beginner?u003c/strongu003e
Based on this list, the u003cstrongu003eFoolproof Buttermilk Sconesu003c/strongu003e or the u003cstrongu003e5-Ingredient Cream Cheese Danishesu003c/strongu003e are the absolute best places to start. The scone dough is very forgiving, and the danish recipe uses a store-bought shortcut that guarantees a beautiful result, making both recipes fantastic for building baking confidence.
u003cstrongu003eWhat is the technical difference between a pastry and a cake?u003c/strongu003e
The main difference lies in the fat content and mixing method. True u003cstrongu003epastryu003c/strongu003e, like the kind used for croissants or pie crusts, relies on layers of cold fat (like butter) to create a flaky texture when baked. This technique is a key part of the art of u003cstrongu003eu003ca href=u0022https://en.wikipedia.org/wiki/Pastryu0022 data-type=u0022linku0022 data-id=u0022https://en.wikipedia.org/wiki/Pastryu0022u003epâtisserieu003c/au003eu003c/strongu003e. A cake, on the other hand, typically has its fat creamed or blended into a liquid batter, which results in a softer, more sponge-like crumb.
u003cstrongu003eWhat is a French breakfast pastry called?u003c/strongu003e
There isn’t just one! The most famous French breakfast pastry is the u003cstrongu003ecroissantu003c/strongu003e. However, other incredibly popular options you would find in a French u003cemu003eboulangerieu003c/emu003e (bakery) include the u003cstrongu003epain au chocolatu003c/strongu003e (chocolate croissant) and slices of rich, buttery u003cstrongu003ebriocheu003c/strongu003e.
Helpful Tools for Making Breakfast Pastries
You don’t need a lot of fancy equipment to create these easy breakfast pastries. Most can be made with just a bowl and a whisk, but a few key tools will make the process even smoother.
- Baking Sheets: A sturdy, light-colored baking sheet is essential for evenly cooked breakfast pastries.
- Parchment Paper: This makes cleanup for all your breakfast pastry recipes a total breeze and prevents sticking.
- Pastry Blender: While your fingers work fine, a pastry blender makes cutting cold butter into flour for flaky breakfast pastries like scones and biscuits much faster.
- Digital Kitchen Scale: For the most accurate results, especially with flour, a scale is the best tool for any serious home baker making breakfast pastries.
Tips for Perfect Breakfast Pastries Every Time
Making delicious breakfast pastries is easier than you think, especially when you know the key secrets. Keep these tips in mind as you bake for consistently great results.
- Insist on Cold Ingredients: The #1 secret to achieving flaky layers in your breakfast pastries (like scones and galettes) is using ice-cold butter and liquids. When the chilled butter melts in the heated oven, it generates steam pockets that cause the dough to split into those delightfully flaky, soft layers.
- Measure Flour with Care: Baking is a science, and even easy breakfast pastries need accurate measurements. A baker’s best friend for accuracy is a digital kitchen scale. If you don’t have one, the “spoon and level” technique is your next best bet: instead of scooping from the bag (which compacts the flour), use a spoon to lightly fill your measuring cup, then sweep the excess away with the flat side of a knife.
- Be Gentle with the Dough: The most common mistake that leads to tough, dense breakfast pastries is overworking the dough once the liquid is added. The moment the last streak of dry flour disappears into the dough is your cue to stop mixing. A lumpy, slightly shaggy batter is a good sign—resist the urge to keep stirring!
- Get to Know Your Oven: Ovens are notorious for having hot spots. To ensure all your breakfast pastries bake to an even, golden perfection, give the baking sheet a 180-degree turn about halfway through the recommended baking time.
How to Store Your Homemade Breakfast Pastries
Want to enjoy your creations for more than a day? Proper storage is key to preserving the freshness of your homemade breakfast pastries. The right method depends on what you’ve baked.
- For Muffins, Scones, and Quick Breads: These are best kept at room temperature. A sealed container will protect these breakfast pastries from air and keep them tasting fresh for about three days.
- For Filled Pastries (Danishes, Turnovers): Because of their cream cheese or fruit fillings, these treats require refrigeration. An airtight container will keep them safe and delicious in the fridge for 2 to 3 days.
- Freezing for Later: Freezing your baked breakfast pastries is a fantastic way to have treats on demand. The first rule is patience: ensure your pastries have cooled entirely to room temperature to prevent ice crystals and sogginess.
- Step 1: Give each pastry an individual protective layer by wrapping it snugly in plastic film.
- Step 2: Step 2: As an additional safeguard against freezer burn, place the wrapped pastries in a sturdy, resealable freezer bag. They will retain their optimal quality for up to three months when frozen.
- To Reheat: Simply let them thaw on the counter or warm them gently in a low-temperature oven.
Your Guide to Amazing Homemade Breakfast Pastries
You now have everything you need to start baking incredible homemade breakfast pastries. This collection of 10 recipes was specifically designed to take the fear out of baking and prove that easy breakfast pastries are not a myth they are absolutely achievable in your own kitchen. This is more than just a list of recipes; it’s your starting guide to the wonderful world of home-baked goods.
The difference between a store-bought treat and a warm, buttery pastry fresh from your oven is truly special. Think of this list as your foundation. Soon you’ll be experimenting with new flavors and maybe even creating your own signature breakfast pastry recipes. The ultimate goal is to empower you to make any morning feel like an occasion with a tray of beautiful breakfast pastries. Learning to create these treats is a skill that will bring joy for years to come.
Remember the tips we covered for keeping your ingredients cold and measuring your flour correctly. These fundamentals are the key to making all kinds of flaky, tender breakfast pastries. Don’t be afraid to experiment!
I genuinely want to hear about your success! Let me know which of these breakfast pastries you decide to tackle first. Please leave a comment and a rating below to share your experience and inspire other new bakers on their journey.
Hungry for more? follow along on Facebook,
Print
10 Foolproof Breakfast Pastries for Beginners
- Total Time: 30 minutes
- Yield: 8 scones 1x
- Diet: Vegetarian
Description
A collection of 10 easy breakfast pastry recipes designed for beginners, ensuring delicious bakery-quality results.
Ingredients
- 2 cups all-purpose flour
- 3 tablespoons granulated sugar
- 1 tablespoon baking powder
- ½ teaspoon salt
- ½ cup unsalted butter (113g), cold, cubed
- ⅔ cup cold buttermilk
- 1 large egg (for egg wash)
Instructions
- Preheat your oven to 400°F (200°C) and prepare a baking sheet with parchment paper.
- Combine flour, sugar, baking powder, and salt in a large bowl.
- Add the cubed butter to the dry ingredients and mix until coarse.
- Pour cold buttermilk in all at once and stir until a shaggy dough forms.
- Turn the dough onto a floured surface, flatten it, and cut into 8 scones.
- Brush tops with beaten egg and bake for 12-15 minutes until golden brown.
Notes
Perfect for beginners looking to build confidence in baking. Each recipe is reassuringly simple with forgiving techniques.
- Prep Time: 15 minutes
- Cook Time: 15 minutes
- Category: Breakfast
- Method: Baking
- Cuisine: American
Nutrition
- Serving Size: 1 scone
- Calories: 210
- Sugar: 6g
- Sodium: 380mg
- Fat: 10g
- Saturated Fat: 6g
- Unsaturated Fat: 4g
- Trans Fat: 0g
- Carbohydrates: 24g
- Fiber: 1g
- Protein: 3g
- Cholesterol: 30mg